Introduction

This blog is a user's perspective on the Micro Four Thirds camera system. Read more ...

Lens Buyer's Guide. Panasonic GH4 review.

My lens reviews: Olympus 9mm f/8 fisheye, Lumix G 12-32mm f/3.5-5.6, Leica 25mm f/1.4, Lumix X 12-35mm f/2.8, Lumix X 35-100mm f/2.8, Sigma 30mm f/2.8, Sigma 19mm f/2.8, Lumix X PZ 14-42mm f/3.5-5.6, Lumix X PZ 45-175mm f/4-5.6, Olympus M.Zuiko 45mm f/1.8, Panasonic Lumix G 100-300mm f/4-5.6, Panasonic Leica Lumix DG Macro-Elmarit 45mm f/2.8 1:1 Macro, Panasonic Lumix G 45-200mm f/4-5.6, Panasonic Lumix G 20mm f/1.7 pancake, Panasonic Lumix G 14mm f/2.5 pancake, Panasonic Lumix G HD 14-140mm f/4-5.8, Panasonic Lumix G HD 14-140mm f/3.5-5.6, Panasonic Lumix G 8mm f/3.5 fisheye, Lumix G 7-14mm f/4, Samyang 7.5mm f/3.5 fisheye, Tokina 300mm f/6.3 mirror reflex tele, Lensbaby 5.8mm f/3.5 circular fisheye lens
The blog contains affiliate links. As an Amazon Associate I earn from qualifying purchases.

Thursday 28 June 2012

Lumix G 7-14mm f/4 ultra wide angle lens

The Panasonic Lumix G 7-14mm f/4 is a highly desirable ultra wide angle zoom lens. Starting at 7mm, corresponding to 14mm on a traditional film camera, it is one of the widest rectilinear lenses out there. One of the wider lenses include the Sigma 8-16mm f/4.5-5.6 for APS-C DSLR cameras, which corresponds to 12mm on film cameras.


Physical

The lens feels heavy, solid and well made. The barrel is made of a plastic material. The zoom ring is rubberized, and rotating it feels smooth and well dampened.

There is no extending zoom tube, but the front element moves when zooming. At 14mm, is is the most retracted into the built in hood, and at 7mm, it is closer to the hood opening.

No filter can be mounted to the front of the lens, and there is no possibility to mount a gelatine filter to the rear side of the lens.

The autofocus is quick and virtually inaudible, due to the internal focus method.

In this short review, I have focused on the lens used at 7mm, where it is the most unique. At longer focal lengths, there are other lenses that overlap.

Example image

This image was taken at 7mm, ISO 160, 1/1300 second, f/4.5, with the Panasonic GH2:


You can notice that there is a significant perspective distortion: The vertical lines are skewed. This is because I was holding the camera non-level (tilted upwards), and does not represent any problem with the lens. It is quite simply a geometrical property.

The sun is inside the image frame (near the Empire State Building), and the lens handles this very well. There is only a minimal amount of flare in the image, and the contrast is still good.

We can take a look at some enlargements (100% crops) from the image, to look at the image quality (click for larger images):

Centre:


Top centre:


Lower right corner:


These crops show us that the sharpness is quite good, although there is some reduction of the sharpness in the extreme image corner.

Sharpness

I have taken some images to look at the sharpness, and compared it with the Samyang 7.5mm f/3.5 fisheye lens (click for larger images).


Lumix G 7-14mm @ 7mm f/8Samyang 7.5mm f/3.5 @ f/8

The focus was set on the buildings in the background. To better evaluate the sharpness, here are some 100% crops from the top left corner.  The images have not been sharpened, and are from the out of camera JPEG images:


Note that this comparison is not entirely fair. I'm comparing the diagonal corner from the 7-14mm lens, which is at 57°, with the corner from the fisheye lens, which is at 90°. This difference is very substantial.

Here is a comparison from the centre of the image:


In the centre, both lenses render very sharply already from the maximum aperture.

It looks like the camera adds some sharpness to the JPEG images for the Lumix G 7-14mm lens, which is not done for the Samyang lens. This could be because the Samyang lens does not have any electronical contacts, and the camera does not know the nature of the lens.

Here is another test of the Lumix G 7-14mm f/4 lens at 7mm. The full image:


Lumix G 7-14mm @ 7mm f/8

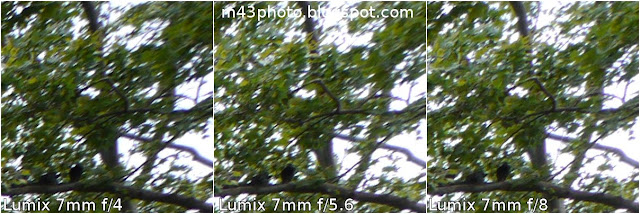
Again, the focus is set on the background. Here are 100% crops from the top right corner:


We see that even when stopping down to f/8, the extreme corner is still unsharp.

In the corners, some Chromatic Aberration (CA) artifacts are retained even when stopping down.

Geometric distortion correction

Like many other Micro Four Thirds lenses, this lens requires in-camera software correction to become rectilinear. However, the adjustments done at 7mm are fairly small. Here is an illustration of the example image with and without the distortion correction. One could conceivably use the output image without the geometric distortion correction, which would yield an even wider perspective.


Conclusion

The Lumix G 7-14mm f/4 ultra wide lens is a very good, and expensive lens. It is a joy to use, and handles flare well. The extreme corners are a bit dull at the widest setting, but this is probably not a big deal with real life usage of the lens.

At the moment, this is the widest rectilinear lens available for the Micro Four Thirds format.

Tuesday 26 June 2012

Lumix G 7-14mm compared with Samyang 7.5mm fisheye

I have previously looked at the field of view of the Lumix G 7-14mm f/4 ultra wide angle lens @ 7mm compared with the Samyang 7.5mm f/3.5 fisheye. However, that comparison was based on the specifications alone, and not on actual images from both lenses. Now, however, I have comparable images taken with both lenses, and am able to compare the field of view and sharpness.

These two images were taken from the same spot, with the camera mounted to a hand rail using the Manfrotto Superclamp. Both images were taken at f/8, and you can notice the Panasonic GH2's tendency to underexpose with the Samyang 7.5mm f/3.5 fisheye lens, especially with the aperture stopped down beyond around f/5.6. Normally, you will want to dial in some overexposure when using this lens stopped down, and when there is high contrast in the image.


Lumix G 7-14mm @ 7mmSamyang 7.5mm fisheye

Click for larger images. Both were taken at the standard 4:3 aspect ratio. As you can see, the Samyang lens gives significantly wider field of view horizontally, and even a larger vertical field of view, just as my theoretical comparison predicted.

We could also see how the images compare when the fisheye image is defished. Read about how to defish the image using the freeware Hugin here. I used the "Orthographic" lens model, which I think gives the best results with this lens. Here are the images, with the right one being defished:


Lumix G 7-14mm @ 7mmSamyang 7.5mm fisheye, defished

We see that the defished fisheye image has a much wider aspect ratio, 2.4:1. That is normal, and is due to the fisheye projection model. This means that the fisheye image has a significantly wider horizontal field of view compared with the vertical field of view.

I will later be looking at the sharpness of the two lenses. But let me reveal right now that I was not so impressed with the corner sharpness of the Lumix G 7-14mm in the widest setting, even when stopped down.

This comparison verifies my calculated comparison between the two lenses: The Samyang lens gives a significantly wider field of view. On the other hand, you lose quite a bit of corner resolution due to the defish process. You could still cut off the extreme ends, and end up with a very wide near rectilinear image with an overall good quality.

Sunday 24 June 2012

Smaller lenses, smaller apertures

When the Panasonic G mirrorless interchangeable lens cameras were introduced in 2008, two kit zoom lenses were initially available. They were the Lumix G 45-200mm f/4-5.6 tele zoom lens, which is still in production, and the Lumix G 14-45mm f/3.5-5.6.

The latter was rather quickly replaced with the lighter and cheaper Lumix G 14-42mm f/3.5-5.6 in 2010. The newer lens has a 13% smaller front lens element, while retaining the same aperture specifications. Not bad!

2011 saw the announcement of newer zoom lenses in the premium X series: The Lumix X 45-175mm f/4-5.6 and the Lumix X 14-42mm f/3.5-5.6. See them below:


Front, from left to right: Lumix X 14-42mm, Lumix G 14-42mm
Rear, from left to right: Lumix X 45-175mm, Lumix G 45-200mm

The newer X lenses are smaller than the original zoom lenses, and retain the same aperture specifications. In fact, The Lumix X 14-42mm has a 35% smaller front lens element, in terms of diameter, compared with the original Lumix G 14-45mm lens. This corresponds to an almost 60% smaller front lens area, see the diagram below:


How is this possible?

One answer is that the lenses do not have the same maximum apertures. Sure, the end points are the same, f/3.5-5.6 for the kit zoom lenses and f/4-5.6 for the tele zoom lenses. But in the middle of the zoom ranges, the maximum apertures are smaller for the newer lenses. See the diagram below for an illustration of this fact:


The diagram uses logarithmic scale. As you can see, the maximum apertures are only the same in the start and end points of the focal length ranges. Inside the ranges, the newer lenses have a smaller maximum aperture. The Lumix X 14-42mm lens has a constant aperture of f/5.6 from f=32mm to the longest end.

This fact is generally not revealed in lens announcements or reviews. So, is Panasonic fooling us? Perhaps. By using "traditional" zoom end point apertures, Panasonic is not drawing attention to the fact that the newer lenses are in fact slower than the ones they replace.

Olympus appears to have chosen a different approach. Some of their premium lenses clearly feature slower zoom end points, e.g., the Olympus M.ZD 12-50mm f/3.5-6.3 and the Olympus M.ZD 70-300mm f/4.8-6.7.

Does this matter? I'd say hardly. Those who are interested can read about it here or in other sources. And since the difference is fairly marginal, much less than one stop, it will have very little practical impact. Modern cameras handle high ISO fairly well, so the loss of some aperture doesn't matter.

All in all, I've found the newer X branded lenses to give better image quality than the older lenses. So I am happy. It is the image quality that matters.

Quite recently, Panasonic has launched another tele zoom lens. It is the Panasonic Lumix 45-150mm f/4-5.6:


Again, we see the same aperture range as the other tele zoom lenses: f/4-5.6. And again, it has a smaller front lens element than the preceding lens. This time, though, the maximum focal length is smaller, at 150mm, which in part explains this.

But I would not be surprised if Panasonic again use the trick of having a more limited aperture as you zoom the lens over the focal length range.

I'm guessing that this new lens will replace the Lumix G 45-200mm f/4-5.6 as the entry level tele zoom lens. This will make more sense from a market perspective, since it will be easier for the sales personnel to explain why the 45-175mm lens is the more expensive, when it also has the longer zoom range. The current situation is a bit counter intuitive, where the 45-200mm lens is the cheapest, but has the longest zoom range.

Friday 22 June 2012

Frequently Asked Questions

From time to time, some readers send me questions. Here are the most common ones, with my answers:

What is your favourite lens?

The Lumix X PZ 45-175mm f/4-5.6 and Lumix G 14mm f/2.5 pancake.

The last year or so, my most used lens is the compact tele zoom lens Lumix X PZ 45-175mm f/4-5.6. As part of the "premium" X branded lenses, this one costs more than the basic kit zoom Lumix G 45-200mm. While the newer has a slightly shorter zoom range, it also gives better image quality, a power zoom, useful for video recording, and a much more compact form factor. It is also non-extending when zooming, which makes it feel very solid.

I rarely carry only a tele lens, though. I often find myself bringing along the Lumix G 14mm f/2.5 pancake lens. It is extremely compact, very fast focusing, and gives good image quality. When having these two lenses, I feel that most of my needs are covered. Some times I need a stabilized short lens for video, though, and if I do, I might replace the 14mm pancake with the basic kit zoom lens.

In addition, I might mention that I like the Samyang 7.5m f/3.5 fisheye lens for the good value for money, and very good optical properties. However, this is a very special lens, and it is not a lens that one would normally use a lot. Fisheye images have some novelty interest, but one should not overuse it.

Would you replace your GH2 with the Olympus OM-D E-M5?

No.

The only feature of the Olympus OM-D E-M5 that I would like to have access to, is the in body image stabilization (IBIS). It would be good to have image stabilization also for non-OIS lenses, e.g., the Olympus M.ZD 45mm f/1.8. As far as I have read, the Olympus E-M5 is the first camera to have IBIS working during video recording, which sounds very useful.

As for the E-M5 camera body itself, I don't like the ergonomics as much as the GH2. Sure, the E-M5 looks nice, in a retro fashion way. But I think the GH2 has a better grip, and, generally, better controls. This is of course a subjective thing, and some will surely disagree here. The swing-out LCD display of the GH2 is also a feature I very much like.

Another subjective thing is the body materials. The E-M5 uses metal as external body material, and I prefer the plastic casing of the GH2. For a small camera like this, I think the plastic external shell of the GH2 is the most sensible. I have accidentally dropped it on the floor (wood and stone) several times without problems, and I have never experienced any problems with the body quality. In my opinion, Olympus chose the metal external shell for the retro feel, and there's nothing wrong with that, it is just not my piece of cake.

While the GH2 built in flash is small, and has a low power, it is still much better than having no flash built in at all, like the Olympus E-M5.

Should I hack my GH2?

Probably not.

Many consumer electronic products now feature "firmware". This is a bit like the operating system on a computer. Without it, the device would not operate.

The firmware is some times upgraded from the manufacturer. You can then download the new version from the internet, and install it to the device for some bug fixes, some improvements to features, or even completely new features. Panasonic and Olympus routinely update the firmware of their cameras and lenses.

Some people have spent time trying to improve the device even more by making unofficial changes to the firmware. Installing these unofficial firmware versions is often refered to as "hacking" the device. This could, given that the author has done a good job, unlock new features of the product, or improve existing features.

It could also be harmful to the product, if there is a bug in the unofficial firmware. The producer might not provide help for a hacked product.

There exist several different hacks for the GH2. These include increasing the bitrate of the video capture, removing the 30 minute video recording limit, and more.

By increasing the bitrate of the video capture, you could get videos of slightly higher quality. The downside is that the video files will also take up more file space.

I my opinion, the video quality of the GH2 is already quite well balanced, and I see little need for increasing the bitrate further. The gains are pretty much insignificant, and the files will become significantly larger.

If you do need video files that are longer than 30 minutes, though, then appying that hack will certainly make sense.

Tuesday 19 June 2012

Sigma 30mm f/2.8 EX DN: It rattles!

So, I just bought the Sigma 30mm f/2.8 for Micro Four Thirds. When unpacking it, I quickly noticed that it rattles. My first thought was: "I have to take it back to the shop, what a mess." But then I calmed down, and searched the internet, finding that this is a common observation.

So the lens rattles, and it is normal. Some Panasonic lenses also rattle, by the way, mostly the ones with an OIS unit, which is loose when the lens is not powered.

You can feel that something is loose when tilting the lens forwards and backwards. I guess that the focus unit inside the Sigma 30mm lens is loose, to enable quick focusing. When the lens is "active", the rattle disappears.

I think that Sigma should put something to this effect on the box, to avoid this confusion: "This lens rattles, and it is normal. Don't worry about it!" On the other hand, that might deter some from buying it in the first place.

Physical

The lens feels well made, with high quality plastics. It has a metal mount. The focus is internal, so the front lens element does not move, unlike the Lumix 20mm f/1.7 pancake.

The front lens element is surprisingly small. On the other hand, the rear exit pupil is unusually large. It is also recessed quite a bit into the mount. Perhaps Sigma made this design choice so that the optical layout could also be used on the Samsung NX format, with a significantly longer register distance? A longer register distance means that the exit pupil must be further away from the sensor.


The lens has a plastic focus ring. It is not rubberized. It rotates smoothly. The focus speed appears to be very good.

Optically

I haven't done any systematic studies yet, but preliminary, I can see that the lens exhibits some CAs in the corners at full open, and even some smaller amounts stopped down to f/5.6.

One could speculate that the lens formula, being designed to work also with the larger sensor Sony NEX format, will exhibit good vignetting characteristics on the Micro Four Thirds format.

It does appear quite sharp, even full open at f/2.8. I will come back with further image quality studies later.

Hood

Sadly, the lens does not come with a hood. To provide some protection against stray light, and, perhaps more importantly, to protect the front lens element against objects touching it accidentally, I screwed a 46mm to 28mm step down ring into the front lens threads, like this:


You'll also need a 28mm front lens cap. Both can be bought online very cheaply, setting you back approximately US$10 including shipment from China.

This simple hood adds some bulk, but makes me feel more safe when I use the lens. That's worth something for me.

Why buy this lens?

At first sight, this looks like an odd lens: It is not very fast, at f/2.8. Nor is it a pancake lens. It is fairly large for a slow Micro Fourt Thirds prime lens, in fact. Both the Lumix G 14mm and Lumix G 20mm pancake lenses are smaller, and faster.

In terms of exotic lens elements or premium branding, it does not have anything extra to offer. And it does not have any OIS unit.

On the other hand, it is very cheap, and seems to provide a good optical quality. So it may be a good choice for users who want to try a prime lens, having come from kit zoom lenses or compact cameras.

The focal length is a bit odd. However, keep in mind that this lens is designed primarily with APS-C sensor size in mind, where it corresponds to a slightly short normal lens. On Micro Four Thirds, it lies between a normal lens and a portrait lens. However, I still think the focal length is fine. It could be used for portrait photography, as long as you make sure to keep a distance of 0.7 meters/2 feet from the subject's head to avoid distortions of the facial features. Or you could use it for street photography, or a number of other applications.

Thursday 7 June 2012

Reversed normal lens as macro front lens

There are many ways to achieve macro photography. There is the obvious one, getting a dedicated macro lens. The Panasonic Leica Lumix DG Macro-Elmarit 45mm f/2.8 1:1 Macro lens is a good macro lens, but it is rather expensive.

Another choice is to use a legacy normal lens, some macro rings, and an adaptor. I write about this method here.

Yet another method is to reverse a lens. Using a cheap adaptor, you can mount a basic Lumix G 14-42mm f/3.5-5.6 kit zoom lens for some very close macro capabilities.

In this article, I look into yet another method. This involves getting an adaptor ring with filter threads on each side. This can be bought quite cheaply at various auction sites. I chose the 52mm to 52mm adaptor ring:


This reverser ring can be screwed into the front lens threads of the Lumix G 45-200mm f/4-5.6 tele lens. Other lenses with 52mm front lens threads can be used as well. However, I found that the Lumix G 14-42mm f/3.5-5.6 basic kit lens was useless for this purpose, it gave too much vignetting when mounting the reversed normal lens.

As the normal lens to mount reversed, I chose the Nikkor 50mm f/1.8 AIS. It is a classic manual focus lens, compact and with reasonably good quality. This video shows how to mount it:


It is best to set the normal lens at maximum aperture, to avoid vignetting. I also found that the Lumix G 45-200mm lens should be set to around 150-200mm for the best results.

Here is my test of the magnification rate using this setup.  I photograph a millimeter ruler to find the magification:


And the resulting image shows that 5mm horizontally is reproduced, with a sensor that is 17.3mm wide. This gives a magnification rate of 17.3:5, or 3.5:1. This is also written as 3.5x, and is an extremely large magnification.


I also made an example exposure of the face of a LEGO figure. Here is the setup, with a working distance of around 5cm:


Which produced this image:


I used the very small f/16 aperture on the Lumix G 45-200mm f/4-5.6 tele lens, and still the depth of focus is extremely thin. Only parts of the curved face is in focus.

Using this method, you can still control the aperture from the camera. You can also operate the focus of the lens, although in practice you are limited to a very small fine tuning of the focus, because of the thin depth of focus at this extremely large magnification.

Example image

Here is an example image of the texture from a sock, taken at 3.5x magnification. This was done by setting the Lumix G 45-200mm lens at 200mm, with the normal lens attached to the front. I used f/18 for more depth of focus, but still the focus is very narrow, and it is difficult to get everything you want into focus:


This magnification is of course very impressive, but one could ask: Could you achieve the same details by using the Panasonic Leica 45mm f/2.8 1:1 macro lens, and cropping out the centre of the image? I tried to photograph the same object using the PL45, and this is the maximum magnification I could achieve. I also used f/18 here:


To evaluate the amount of details from either setup, here are 100% crops from the centre of both images. The images have not been sharpened. Click on the images for the full view.

200mm + reversed normal lens, centre cropPL45, centre crop

Based on this comparison, it is clear that using the reversed normal lens does give a higher resolution than simply using the PL45 macro lens. However, the image quality suffers a bit due to the number of glass elements the light must travel through.

Summary

Here is a summary of various ways to achieve a macro ability:

Methodmagnificationworking distanceaperturefocus
Using a dedicated macro lens, the PL451:1 max6cmautoauto
Macro extension rings, and a legacy normal lens1.4:1 in my example6cmmanual, if the lens has an aperture ringno focus possibilty
Macro reverser ring, with Lumix 14-42mm2.5:1 - 1.15:12-4cmno control of aperture from camerano focus possibilty
Olympus ZD 50mm f/2 lens with extra 65mm extension2:13cmno control of aperture from camerano focus possibilty
Lumix G 45-200mm with reversed normal lens (this article)3.5:15cmautoauto, but only small adjustments

Based on this table, we see fairly easily that this method is in fact preferable, given that we need such an extreme magnification rate. It gives a good working distance, and automatic aperture handling, which is quite useful. There is also some possibility for fine tuning of the focus using the lens' own autofocus system.